
Creative Problem Solving
5th Grade Unit about designing and creating a prototype for a tool that measures something important in a student's life.

Getting Started
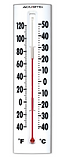
We start this unit discussing key vocabulary terms and discussing various tools people use to measure things. Tools we discuss range from clocks, thermometers, maps, compasses, rulers, pain scales and more. We discuss what is being measured, what kind of scale the tool uses, and whether or not the tool is measuring something subjective or objective. The students record their findings to use later when designing their own tools.


Designing Diagrams
Next we discuss the attributes of a diagram, and how the labels provide information about the parts of the tool and how diagrams inform us of the function of the tool itself. After a guided brainstorming session, students begin to draw diagrams for their unique measuring tool.


Creating Prototypes
Once the students have designed their diagrams we discuss creating prototypes and I demonstrate how to use glue sticks, white glue and hot glue guns to join materials. Students are supplied with tin foil, pipe cleaners, popsicle sticks, wooden beads, cotton balls, construction paper, cardboard, and a variety of recycled materials to build their prototypes. Students are encouraged to bring in supplies from home to help build their tools as well.
Criteria for their prototypes include:
-
Passing a stress test so none of the pieces fall off when their tool is handled
-
All surfaces and or brand logos must be covered or wrapped
-
Their diagram must provide the supporting information to explain the function of their tool and what it measures


